Spray painting origami paper
Along with pre painting origami paper with acrylic paint, I use spray post painting. Usually after the model is done.
I like this technique for many reasons:
- It allows to completely change the color of the origami paper. Sometimes I fold some test fold from some bright colored origami paper and it comes out so good in terms of shade. Then I can just paint it with spray until I get the color I like.
- it strengthens the origami paper. After you add several coats of spray paint, the model becomes thicker and actually holds it’s shape better.
- the whole thing is usually water resistant (if you spray it from both sides), so it will last longer and won’t react to humidity.
- You can add depth with this kind of painting easily.
- It dries really quickly.
Although it is not hard to do, it is not obvious for many people I talk to. Let’s have some closer look. I would divide spray painting into two phases:
- Getting base color (this part can be omitted if you are already using the shade you like)
- Making the color deeper and more beautiful.
Getting the base color of the paper
For a beautiful result you might want your base color to be dark. Why dark? Because we are going to add some lighter colors on top. Sounds confusing? There’s a common human perception, that assumes that deep regions of some surface are darker and the front surfaces are lighter color. You can easily see that yourself if you look at somewhat grey corrugation made of matte paper. Because of the light distribution, deeper areas usually look darker. In order to make your origami look more dramatic, we could improve that contrast with paint. Deep areas are also harder to penetrate with spray paint. So we want to make the base color dark…
We could either take dark shade paper or paint it…
The setting:
I use an old box for painting. It’s very comfortable, since it protects everything around. And it’s also fast to mount. The box walls allow me to install the painted stuff at the needed angle.
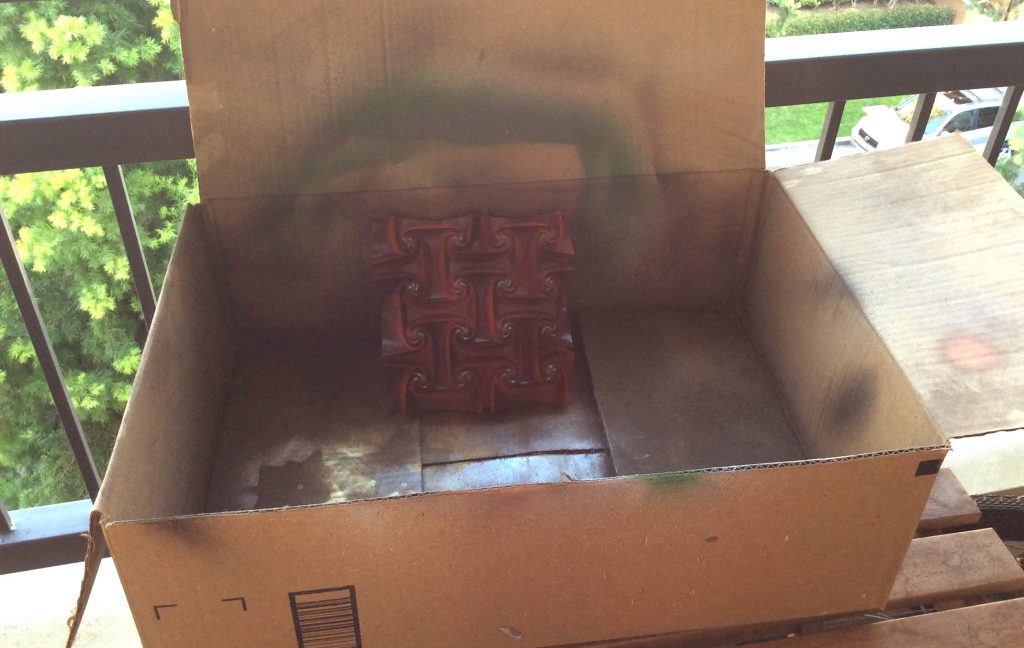
It is also very important to do it outside! Use backyard, patio or other well ventilated area. Those paints smell and they are toxic. I also try to get the wind taking the smell away.
The process
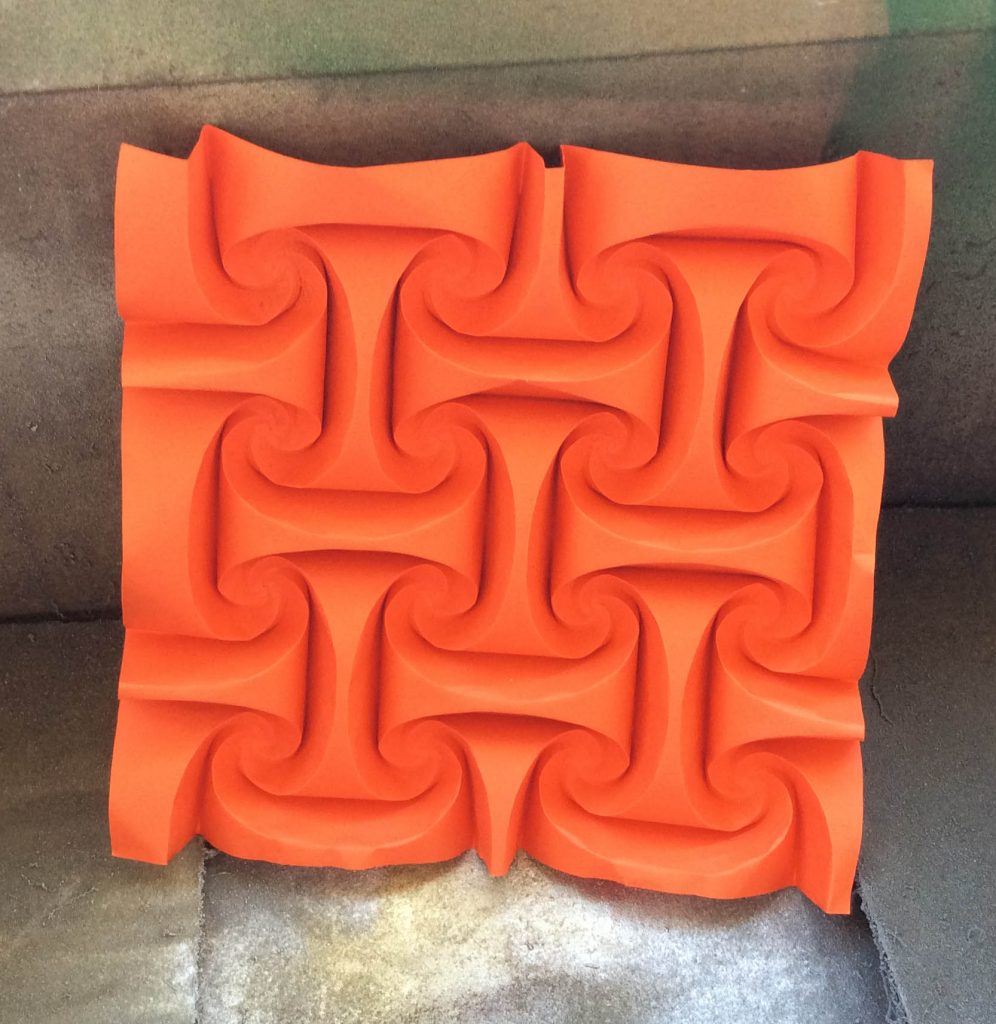
I had a test fold of a corrugation from red tant origami paper. I call those colors ‘model killers’ since they are too bright. And no matter how good is your model’s geometry, the red color just makes shades undistinguishable. This is one of the sides of the model to get you and idea of original color. I started painting it before I decided to take pictures. It’s very bright.
Then I took the dark brown spray paint with satin finish. I don’t like gloss finishes, since they make your origami look like plastic. And they are less forgiving to your errors too… My paint is Rust Oleum in color Expresso. $3.85 at Walmart. Quite affordable.
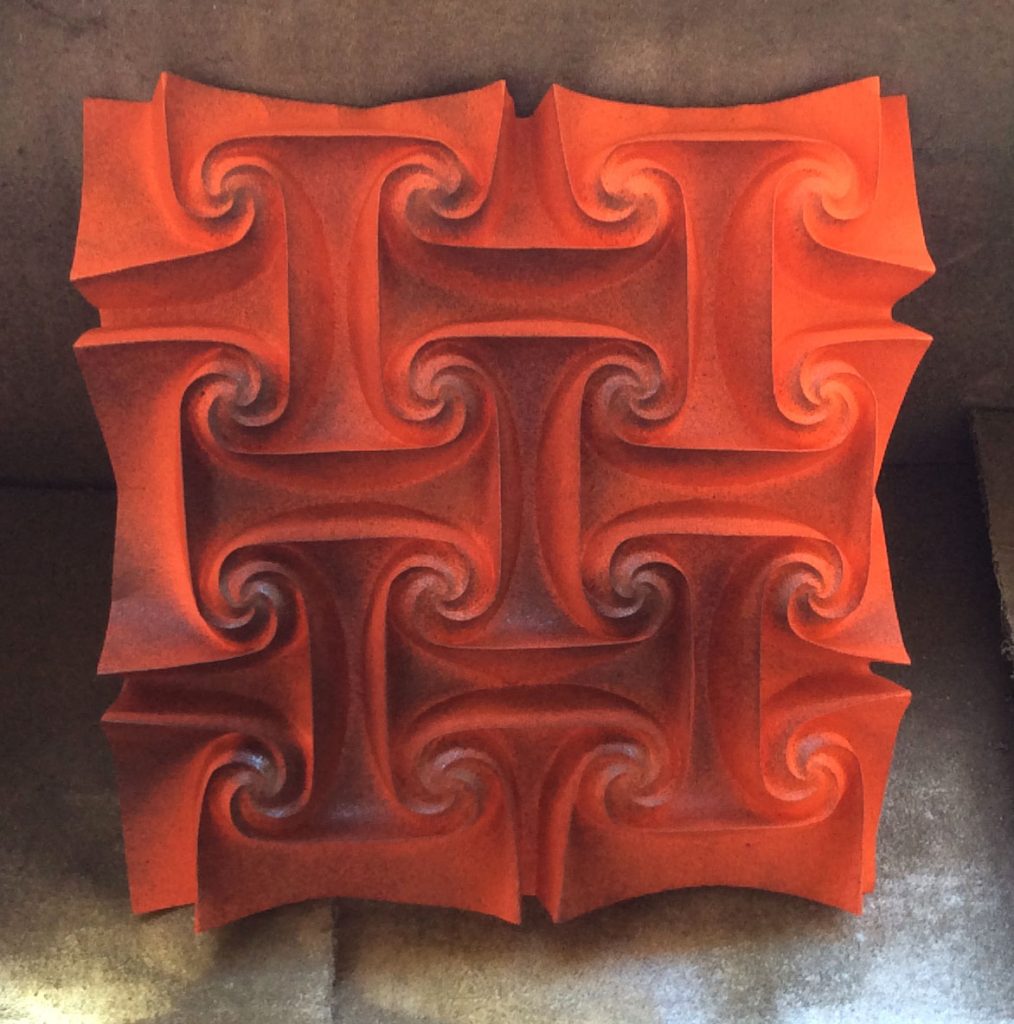
I made a few bursts of the paint. Patience is the key here. If you are too fast and if you don’t let paper dry between coats, you might get in trouble. You also want to avoid paint gathering in drops. So it’s just several gentle pushes. The distance of spraying highly depends on the exact can. Some types of paint require 20 cm distance and some up to 50 cm. My goal is to make each burst gentle with no sharp borders. I do not hold the button all the time, instead I push very quickly. This way you can estimate what you get between the bursts and not get too much paint.
It’s always better to use more thinner coats and let them dry completely.
As you may already see, the paint is not distributing evenly on the model. It’s due to model geometry. To avoid this behavior I stretched the model with some supporting cardboard behind. This way I can control paint flow better. Please ignore the effects of liquid paint: it’s dark brown, just reflecting the light. As soon as it dries it is no more ‘blueish’ color.
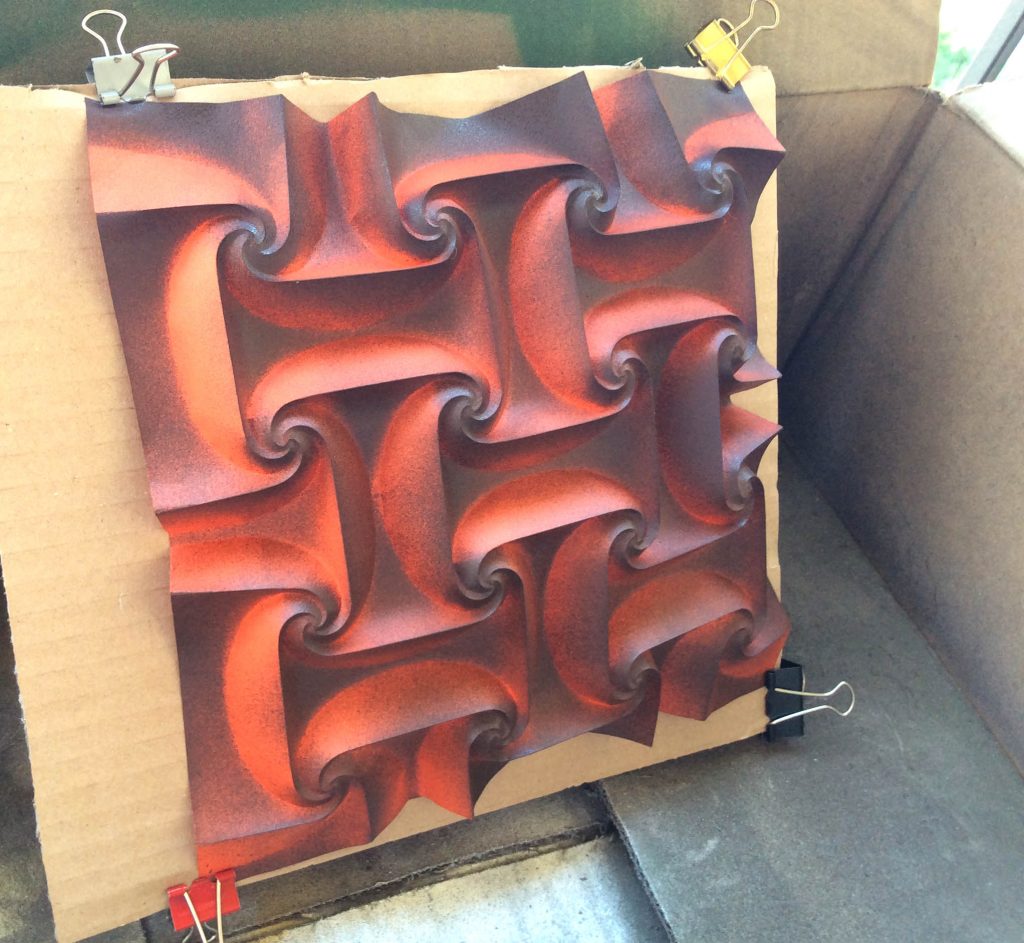
You don’t need to paint it with base color entirely in some cases. I left some slight red areas, since they can add some color variance to my artwork.
Making it beautiful
As soon as the surface is more or less colored you can start adding other colors. And then we come to an art part of painting. At least I don’t think that painting it to flat brown color is somehow artful.
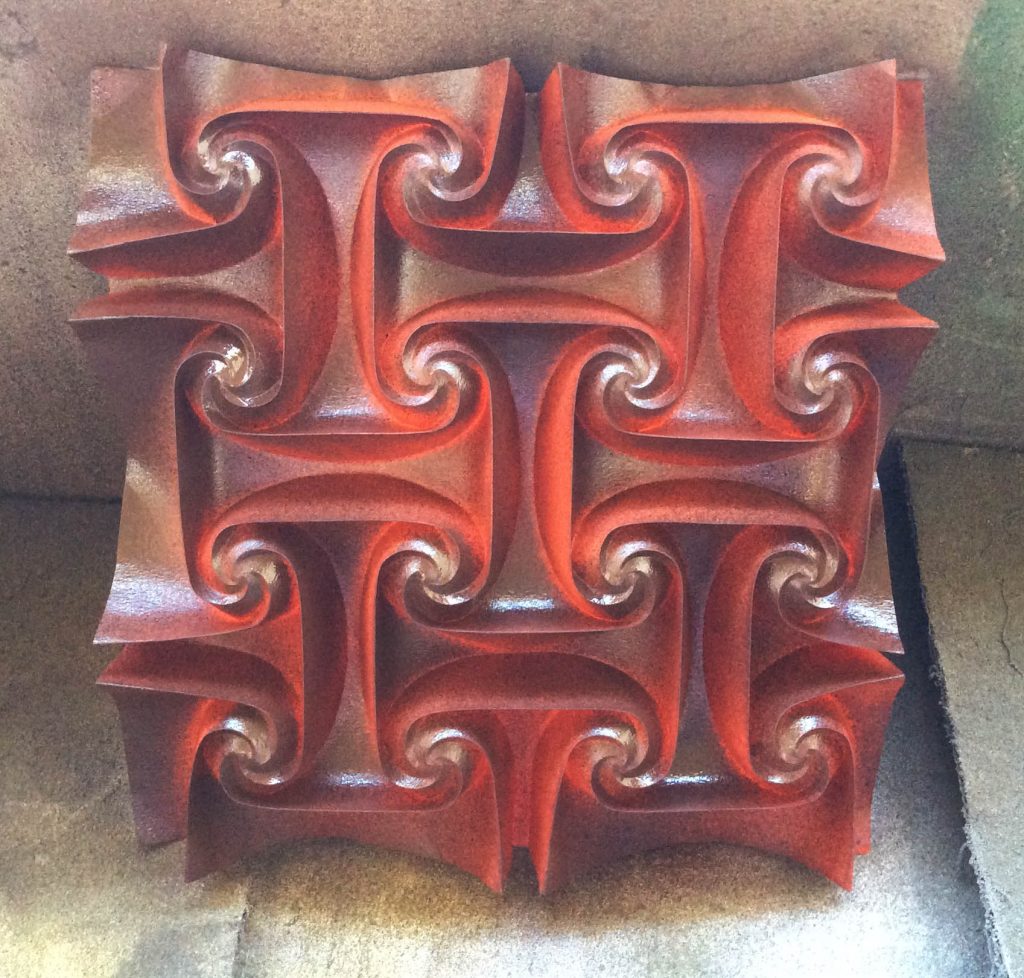
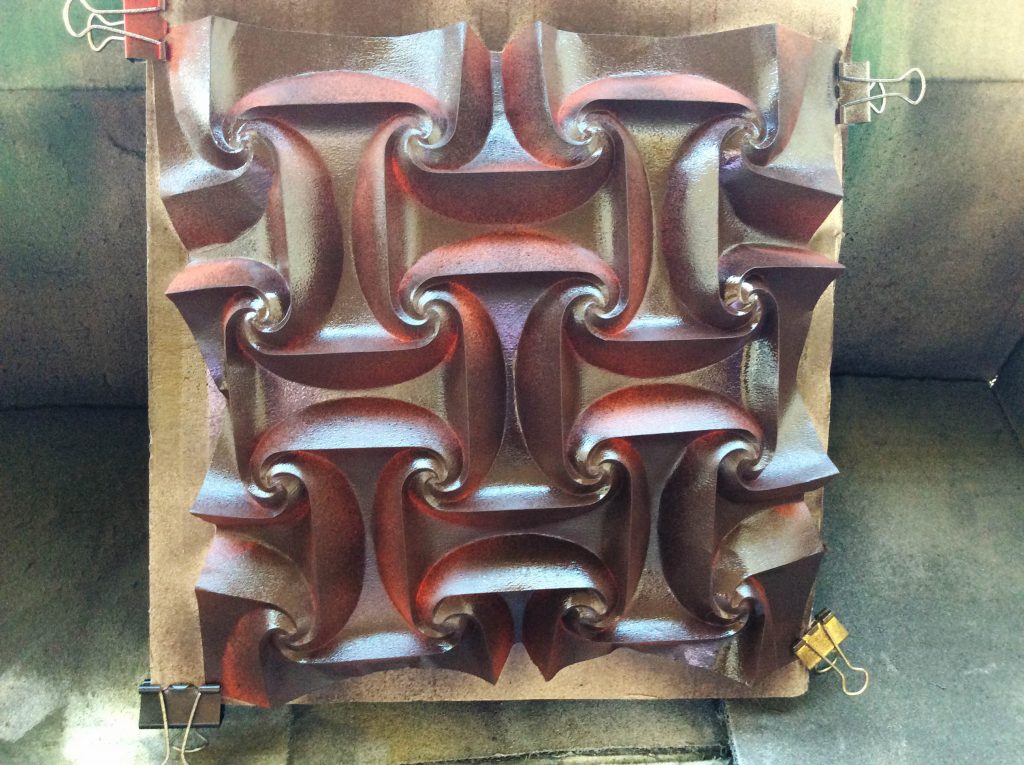
First of all I removed the stretching cardboard and shaped the model to the size I want it to be. This way as soon as I add lighter colors they don’t get to the deepest parts! Easy!
I took metallic paint of brown color. Oh yes, the colors should kind of match. This color is semi-transparent in one coat, so it allows you to build smooth transitions… This it the result.
The golden reflections you see now is not because it’s wet. It’s because I painted it. You can see that this brown metallic adds deepness to the model, making closer parts pop more than before. I used Rust Oleum protective enamel “Antique brass”, somewhat bronze color (color was rather dark, not usual bright copper!) I found a good selection in Home Depot and paid something like $5 for this can. Metallics are usually more expensive. But still affordable.
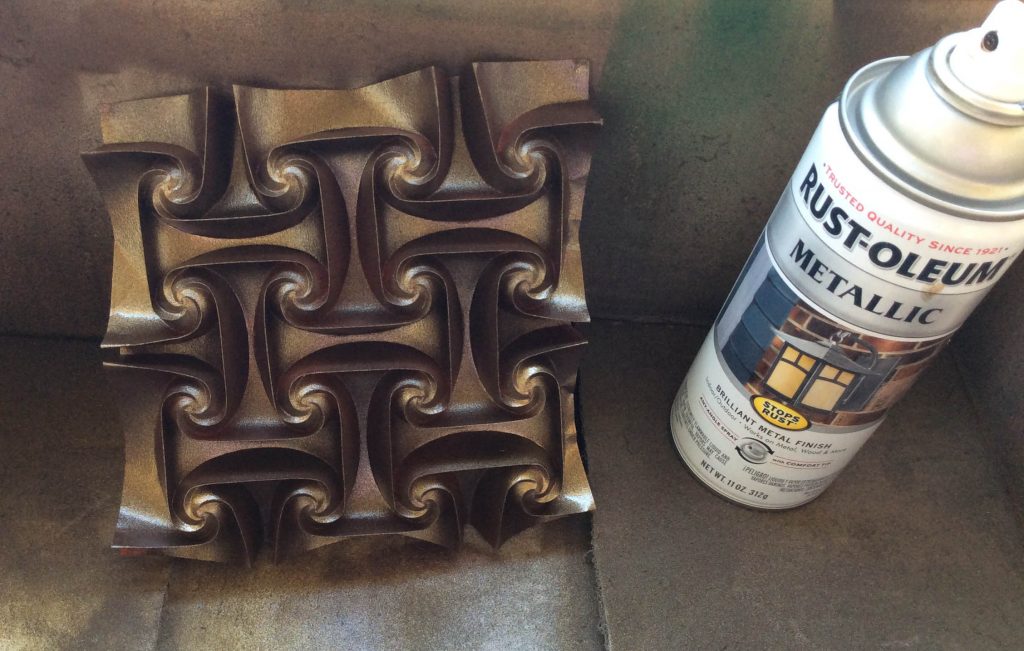
And this is the place you can start experimenting. Adding paint at different angles and thicknesses…. It really gets more creative…
And then I took bright gold spray. Oh yeah! It’s very gold and you should be really gentle to make it look decent, not cheap. Again you need few pushes… Don’t go overboard 😉
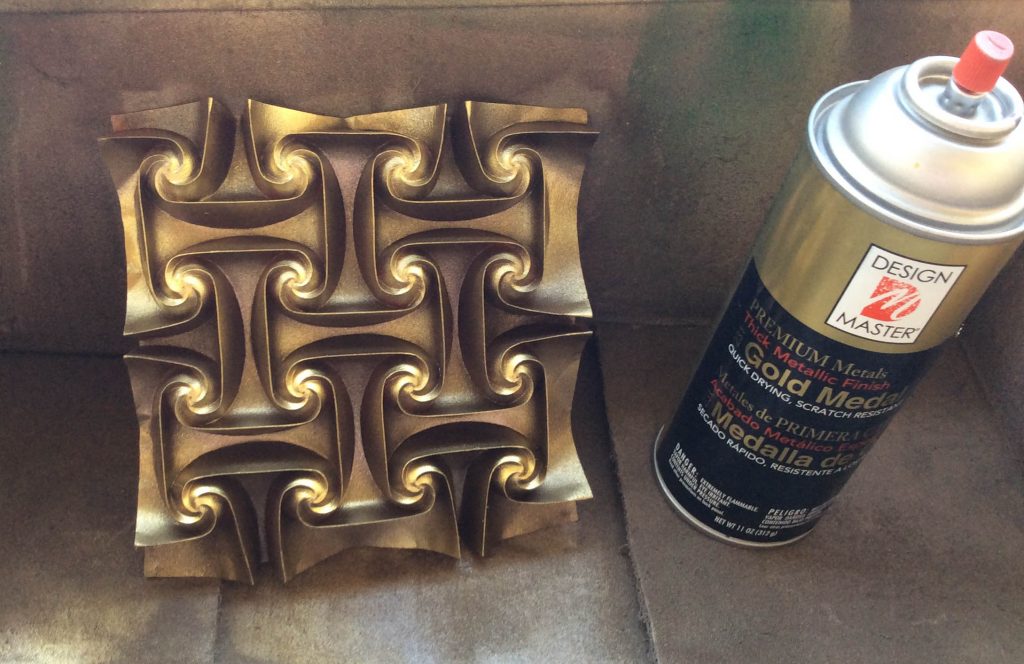
And with the uppermost layer you might want to spray at an angle to protect your deepest shades. Or even mask your shades somehow.
If you can stretch or squeeze your origami tessellation, it also helps maintaining shadows.
Questions left
- Can I combine acrylic painting with this one? Of course!
here’s the good example of combining those techniques:

- Can I use acrylic for post painting? Of course! (but probably before spray so that it is able to stick)
- Does the process change the texture of the origami paper? – surely yes. it becomes thicker, harder. Depending on the paint in might get smoother or more grainy…
you are always welcome to ask question in comments 🙂
3 Replies to “Spray painting origami paper”
This is great!
Thank you!
Thanks sharing valuable know how. I have asked by many Origami folders such as Tomoko Fuse about coating paint on folded paper. I have substantial knowledge on paints on architectural products but not much for paper. I often answered using fixatif spray for protection of charcoal drawings on paper may work on Origami. But I have never tested yet. Your using several shades of color before the top metallic coating are similar to those for automobile painting and scale model weathering paint.